Aluminum is one of the most popular and widely used materials for manufacturing a diversified range of products that includes producing home appliances all the way up making commercial airplanes.
Besides, it’s also one of the most flexible materials for welding purposes since you can join aluminum workpieces by using two of the major welding processes including the brazing technique which doesn’t require any welder to perform!
Now let’s learn about all of them in detail:
What are the Usual Ways to Weld Aluminum?
As said above, there are basically three major ways to weld aluminum. A welder can choose either of them to effortlessly do the work. But TIG welding is the most popular method for joining aluminum. Let’s learn about each of the processes in particular:
TIG Welding:
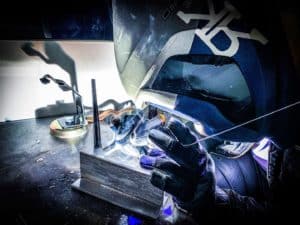
 This process is also known as Gas Tungsten Arc Welding (GTAW) which is performed by using a non-consumable tungsten electrode with a TIG welder. The welder holds the electrode over the workpiece and melts it by striking up the arc while continuously feeding a filler rod or consumable to the weld pool.
A TIG welder basically comes with both AC and DC power options. Since you’re going to weld aluminum using TIG welding, you’ll need to choose either the DC positive or DC negative power.
TIG welding also uses shielding gas for protecting the overall process from atmospheric contamination. This includes argon and a slight composition of helium gas. We’ll walk through the complete Step-By-Step process shortly.
MIG Welding:
 This process is also known as Gas Metal Arc Welding (GMAW). You’ll need a MIG welder to perform this operation. Now, one of the main differences between this process & TIG welding is that it basically uses a consumable electrode which is non-tungsten.
During the whole time, a welder is required to continuously feed the electrode inside the weld pool. The welder also needs to maintain an appropriate gun angle (around 10-15°) above the joint area. This is another most popular process to weld aluminum.
I have a very interesting article for you about how to MIG weld Aluminum without shielding gas!
Brazing:
This method best known for joining thinner materials like aluminum. The main advantage of using the brazing technique is that you don’t require any welder to perform & only the filler metal needs to be melted, not the base metal. A propane torch would be enough to perform aluminum brazing which is still a widely used process in joining metal parts.
How to TIG Weld Aluminum?
Now that we have come into the main section, the rest of this guide will teach you how you can TIG weld aluminum in a step-by-step manner. However, at first, we will learn what are the essential tools and gears we are gonna need in order to effectively perform TIG welding.
What Are The Required Gears?
Welding tools
- A TIG Welder: This is basically the first item you’re gonna need on the list. A TIG welder is the main instrument that will supply current through the electrode and perform the core operation of aluminum welding. You just need to buy the one that comes with sufficient power and functionality to effortlessly perform aluminum welding.
- Tungsten Electrodes: As TIG welding generally uses tungsten electrodes which are non-consumable, you’ll need a couple of them in your collection. This is because oftentimes they require their tip to get sharpened which periodically consumes them away.
- Filler Metals for Aluminum: There are basically two types of filler metal used for aluminum welding. They are known as 4043 and 5356 alloy. You can use either of them but make sure the stick size is as tall as the electrode.
- Shielding Gas: Shielding Gas will be used for protecting the workpieces from getting atmospheric contamination. We’ll basically need argon gas for welding aluminum. Besides, if you want to work on a very stable arc, you’ll require 3% of helium inside the gas.
- Welding Clamps: This is something many welders overlook. Using C-clamps in welding is very necessary because any time the workpiece can move apart from its position which can completely ruin your project. So these are something worth spending money on.
- An Angle Grinder: The main duty of this machine is to grind away all sorts of rust & paint from the surface of your workpiece. Otherwise, it may end up bringing post welding contamination.
- Sheet Metal Gauge: They are mainly used for measuring the accurate thickness of any metal part that you might weld.
- Welding Magnets: Magnets help to position the workpieces into many different angles so that they don’t move apart during welding.
Welders Safety Gears
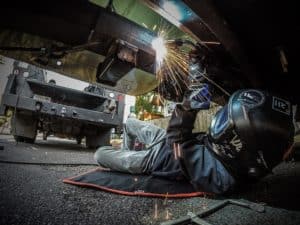
- A Welding Helmet with Darkening Lenses: This is the most essential gear for every welder. A welding helmet will protect your overall face area from fire and sparks. Besides, as they come with adjustable lenses, wearing these helmets will allow you to transparently observe the weld area.
- Welding Gloves: Your hands & wrists are the nearest working part of your body from the weld area. Therefore, wearing welding gloves is a must for any welder in order to perform TIG welding.
- Welding Jacket: A welding jacket will protect your complete upper body from fire and harmful substances like metal sparks. Not to mention, this is one of the most crucial gears of the list.
- Welding Chaps: Unlike welding jackets, welding chaps are designed to protect your complete lower body excluding the feet from all sorts of harmful substances and fire.
- Kneepads: They can be very helpful and comfortable when you’re set to work for long hours.
- Respirator or Masks: Everyone knows welding generates a high amount of toxic fumes which are very harmful to your body. In fact, inhaling it for years may result in serious health defects or even cancer which is why every welder should wear a respirator or at least masks during welding. You may consider buying a weld fume extractor, worth every penny.
- Welding Boots: You’re gonna need a shock-resistant welding boot in order to protect your long-standing feet from the fire, heat, and other melted pieces of metals from dropping off over your feet.
Conditions Required For Your Workplace
Although aluminum is relatively thinner and lighter than other metals, welding it will certainly generate a high amount of toxic fumes like welding other materials. So the area where you’re set to work should have a well-ventilated system in order to allow other gases to pass out. Besides, all the welding tools should be approachable from your hand in order to effortlessly weld aluminum.
The Step-By-Step Process to TIG Weld Aluminum
- Put On Your Safety Clothes: This is the first and foremost thing everyone should do. You see, welding is a process that is super intensive of fire and flames.
Any minor fault can bring fatal damage to your body and skin. Just put on your welding jacket, gloves, chaps, & boots before even touching the welder machine. Besides, you’re required to wear a mask or respirator before initiating the process.
- Clean Up Your Workpiece and Filler Rod: You’ll require an angle to do this task. A general fact is aluminum materials often form aluminum oxide coating over their bodies. Consequently, they delay the typical time period required for aluminum to get melted.
On top of that, your aluminum parts can have rust and paints over its surface which can also cause contamination. So grinding the workpiece prior to welding is very essential. Besides, you should also clean up your filler rods by using abrasive cleaning pads.
- Clamping: As discussed earlier, you’re required to clamp down your workpieces by using several C-clamps. You can clamp them down to your welding table. Make sure they are firmly holding your workpieces down to the table as soon as you attach them.
- Preheat Your Workpiece: It’s a general practice that aluminum is preheated before performing any welding operation. This is because it makes the joining work a lot easier. Using any propane torch or putting it inside an oven could be enough. Just make sure it reaches 300 to 400 degrees Fahrenheit at least.
- Configure Your Welder: Now this is a crucial step. Before setting up the amperage, you’ll need to ascertain the accurate thickness of your workpiece. You can use the sheet metal gauge for doing this task. We’ll basically use 1 amp of power for every 0.001 inches of metal thickness. Hence, do that accordingly after you’re done with identifying the correct thickness.
- Setting Up The Torch: Put the tungsten electrode through the welding torch. A general rule is to leave a small visible part of the electrode outside the torch which shouldn’t be bigger than the size of the nozzle. Besides, the tip of your electrode should be sharpened which you can manually do by grinding.
- Determine The Correct Angle: Now position your torch at an angle above the joint. Standard practice is to put it above a 75° angle from the joint edge.
- Draw An Appropriate Weld Puddle: Now push the trigger switch or foot puddle to power up the torch and begin melting the workpiece. Firstly, you need to produce a puddle that shouldn’t be bigger than your filler in diameters. Afterward, fill out the joint area by continuously feeding the filler rod. Never put your filler rod until you’re done with producing the puddle.
- Dip the Filler Rod Every Few Seconds: Lastly, just make sure you’re feeding the filler rod steadily after every few seconds until the full area is welded. Besides, as aluminum can crack very easily, just slowly reduce the amount of current supply to allow the puddle to get solidified
Additional Read: How To TIG Weld Magnesium
Measures to Ensure Safety
Don’t heat your workpiece for too long and always store a fire-extinguisher near your workplace. This will do for now.
Final Words
The use of aluminum is increasing in every sector. This is because the material is very lightweight and thin. Any welder knows how to TIG weld aluminum professionally will have a competitive advantage. For all the aspirants, you can use this guide as a reference. Thanks for being with us.
