
Having a few tricks up your sleeves can really make the whole session much easier while welding for hours. Like most other mechanical procedures, TIG welding too, takes loads of time and patience to get used to. In fact, you’ll find that several mechanics won’t have any idea about certain basic parts of the welding procedure. Even after years of welding experience, that is.
For instance – do you need a foot pedal with a TIG welder? Half the TIG welders will still provide an affirmative response to a question like that if you were to ask them. When the truth is a lot more diversified and complex than just a simple yes or no. While foot pedals surely are an essential part of the TIG welding machine, they aren’t, by any means, an absolute necessity.
The main purpose of the foot pedal is to control the amperage i.e. the pace at which you’re welding. As such, it mostly greatly helps the newbies, since they are yet to get used to the concept of upslope. Using foot pedals can ensure the accuracy and integrity of the welding that they can otherwise find hard to achieve.
Hence, the primary question is – do you struggle with juggling the parameters concerning accuracy and quality while welding? Then the foot pedals will help you out in controlling such nuisances. However, like most other mechanical apparatuses, they too, have their drawbacks.
In hopes of maintaining proper quality, you might just end up sacrificing valuable time and energy with the foot pedals. They can cause great discomfort too, depending on your positioning and placement during the welding.
As you can see, the answer to the aforementioned question isn’t as simple. To know why you should use a foot pedal, you need to know how they work in the first place. And knowing about a few alternatives can’t harm either, for the sake of having different options during welding.
So, let’s have a descriptive rundown of all the nitty-gritty details related to foot pedals and TIG welding. From their purpose to usage to set-up instructions, we’ll try to cover it all in today’s article, for our beloved readers.
Benefits Of Using A Foot Pedal In TIG Welding
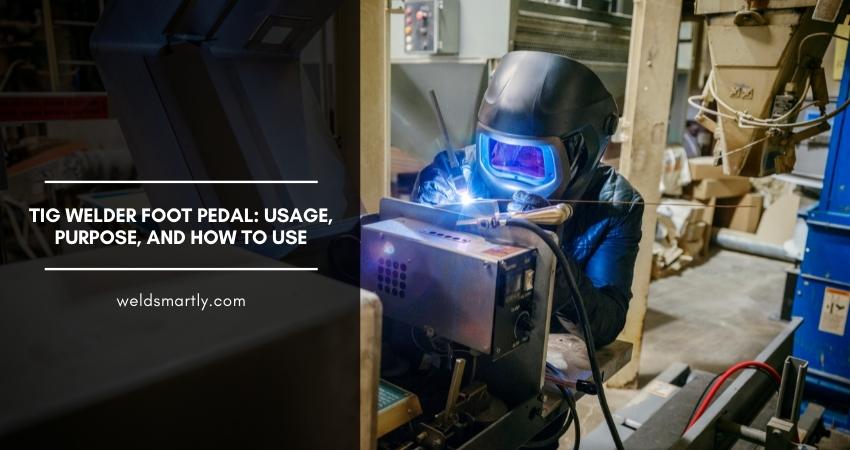
TIG Welding is anything but easy. It’s a procedure that requires utter dedication, and even more than that, hours of practicing. You need all the help you can get to get yourself adjusted to the rhythm of the system.
And that’s precisely where the role of foot pedals pop in. By controlling certain key functions, they can ensure much better maneuverability and pacing during welding. Here’s a list of all the benefits you can hope to achieve from using foot pedals in TIG Welding.
Controlling The Amperage
Foot pedals, by the very definition, are known for controlling the amperage. As for how it controls the given amperage, we’ll get to the details in just a while. In simplified terms, all you need to think of are the gas pedals in a car.
By setting the appropriate speed, if you pedal to the fullest extent, you’ll achieve the desired speed while driving. Similarly, in TIG welding, you need to fix the amperage first in advance. The amperage will be decided on multiple factors. Like thickness of the metallic item/cover, impurities in it, melting point, etc.
Once the amperage has been jolted down, you can then control the speed of the upslope via the foot pedals. Floor the pedals to get the maximum amperage directly or slowly build up to it at your own pace.
With foot pedals, you have the luxury to adjust the amperage on the fly. And by doing so, making them an indispensable part of welding. Although, the upslope will proceed on a linear scale, taking its sweet time on the way.
Which can end up being both a blessing and a nuisance depending on your welding skills. But despite that, there’s nothing better than foot pedals in TIG welding to control the amperage.
Maintenance Of Steady Upslope
If you play around enough with the control panel, you should know about the upslopes. In simplified terms, they basically refer to the rate at which your amperage is increasing.
It’s also related to the overall time it takes to reach the expected/fixed amperage. If you’re not using foot pedals, you’ll need to directly dictate the upslope in the panel. And then you can continue to work via those fixed settings.
By doing so, you may cut down on the time it takes to complete the upslope. But it won’t be as steady. If you need to complete the procedure in a steady-state, foot pedals are an absolute must. You’ll gradually rise through the upslope. As a result, you can adjust the amperage as well however you’d like to on the fly.
Reduction Of Complications
If you’ve ever tried to weld via the automatic settings, you’ll find that it’s quite stressful. The control panel is anything but an easy-to-understand set of machinery. Hundreds of little lights blipped everywhere, indicating all sorts of both necessary and unnecessary settings.
Unless you take the time to get familiarized with all the settings, it’s next to impossible to weld via them. A foot pedal can truly reduce the number of complications in such cases.
It’s associated with only the primary components of the welding experience. As a result, you won’t have to immediately deal with all the advanced settings and options on the control panel. You can focus on improving your welding skills momentarily and then move up the leagues when you feel ready enough.
Providing Proper Adjustability
As mentioned above, foot pedals allow you to adjust your working amperage on the fly. And that’s something you’ll need to seriously master if you move over to automatic controls.
As long as that’s not the case, it’s best to stick with foot pedals for the time being. It’s easier too, and you have fewer chances of making potential mistakes during the welding.
Perfect For Newbies
Adjustability, straightforwardness, lack of complications, steadiness, and better control – foot pedals can offer all these to the newbies. Foot pedals are like training wheels to bicycles. It’s quite hard to grasp the mechanism of welding without trying out the pedals first.
So, if you’re just starting, don’t bother to use any alternatives in lieu of foot pedals. Learn to use them to their fullest first no matter how long it takes. Once you’ve fully mastered them, only then you can move on to the control panel direct settings or wireless pedals.
Easy Operations
Foot pedals are just like the pedals in cars. There are no significantly different or complex settings to them. And you can mindlessly drive up or down the amperage via your feet while welding anything. After a while, it becomes second nature and you no longer feel any different doing it simultaneously.
Hence, even as an expert, if you struggle to deal with the control panel, use the foot pedals instead. Fastidiousness usually amounts to nothing if you’re not maintaining enough integrity during the welding procedure. ‘Slow and steady wins the race’ – is quite the apt proverb to describe these specific situations.
Much Comfortable (If You’re Sitting Down)
Foot pedals are the best if you’ve got a habit of sitting down while working in a certain place. Then you can simply set up the foot pedal under the working bench and keep on welding. It’s no different than setting up a sewing machine, one might say.
However, it’s a much different case if you’re working on different components at once. Or, if you constantly need to move around instead of sticking to a specific bench. It can then get quite tiresome to drag the pedals alongside you.
Other than that, if you’re strictly sitting down, we’d highly recommend using foot pedals. They’re both comfortable and offer great adjustability alongside consistency when they themselves are properly stationed. So, if you’re working on a big piece, it might be more beneficial to switch to the foot pedals instead.
And that’s about it for all the basic benefits of foot pedals during TIG welding. Hopefully, the answer to ‘do you need a foot pedal with a TIG welder?’ is starting to get much clearer.
Needless to say, there are many more mechanically intricate benefits to these pedals. But let’s not bore you guys out with such deep technical details today. Rather, let’s have a look into the whole controlling of amperage routine that the foot pedal is most famous for.
TIG Welding Foot Pedal Rundowns: How Does It Control The Amperage?
So, by now everyone knows that foot pedals effectively control the amperage while welding. But how do they do that? Well, let’s find out!
In tough physics terms, the foot pedals consist of rheostats i.e. high-power potentiometers. The range of the potentiometers differs depending on the voltage of the control panel i.e. circuit itself.
After the pedals have been plugged in, the rheostats in the pedals will match with the settings in the panel. You can then directly use the pedals to strategize and manipulate the magnetic amplifier circuit. You can also control the sequencing controls for the arc itself.
As such, starting or stopping them at any given second by throttling the pedals to the fullest. By manually handling the upslope, downslope, frequency, etc., you can use the pedals to influence the amperage.
In other words, you can choose to think of a simple amplifier instead of the complex advanced physics configuration. To dictate the extent of the sound, you manipulate the knob on the amplifier, don’t you? Similarly, the rheostats work as such knobs in the foot pedals.
The rheostats vary depending on the voltage. Hence, by manipulating the voltage via the pedals, you can successively amplify the input. You can either drive it up to the high power stage or make it go back down.
The stage will move forward or backward steadily with a linear slope. It’s all about controlling the input and output of the current to adjust the intensity of the welding procedure.
Determining The Appropriate Amperage: Do’s & Don’ts
Amperage refers to the overall strength of the active current in an electric circuit. While the voltage dictates the pressure of the flow of electrons, amperage dictates the volume of these electrons in flow. Whether you’re using a foot pedal or not, knowing how to determine the amperage is a big deal nonetheless.
That being said, it’s somewhat a lot easier with foot pedals. With foot pedals, you can simply use the pulse settings and control the amperage comfortably. But if you’re not using pedals, you’ll need to resort back to the control panel.
Now with control panels, you’ll have no choice but to work with a steady amperage. You won’t have the safety net of changing the amperage at will as you did with the foot pedals.
So, here are a few tips and tricks for determining and managing the amperage in such cases.
Thickness Of The Material
Foot pedals or not, knowing the thickness of the material you’re working on is a must for all welders. Here’s what you should never forget. The thickness directly influences the amperage needed to weld safely through the material. Too much amperage will cause excessive heat to build up and burn right through everything.
Type Of The Material
Different materials correspond to different treatments while welding. As a result, the formulas for amperage calculations end up getting changed a little as well.
For instance – while welding steel (mild), you multiply the thickness by 1.3 to measure the appropriate amperage. Here, the thickness is taken in its thousandth form. A similar procedure is followed during welding aluminum besides mild steel.
But while welding stainless steel, you should multiply the thickness by 0.7 instead. The reason is that stainless steel has a low melting point since it’s got a much higher percentage of impurities. If you use high amperage, you will risk causing holes in the piece that you’re welding on.
Adjusting The Duty Cycle
The duty cycle filters through the background amperage to initiate the actual amperage. Therefore, it’s important to adjust the background amperage accordingly to make sure the duty circle adjusts the amperage in turn.
In this case, choosing to pulse weld makes a lot of differences. If the pulse settings are on, then keeping the duty cycle at 50% will halve the amperage every time. Hence, you’ll need to double the amperage in advance.
Why? Because only half of the background amperage will act as the output due to the influence of the duty cycle. Similarly, if the cycle is kept at 75%, you’ll need to calculate the background amperage accordingly.
And once you reach 100%, it effectively means that no pulsing is taking place any longer. Like the Carnot cycle of heat engines, you’ll continue to get 100% of your input amperage as output.
Do You Need A Foot Pedal With A TIG Welder?
By now, the benefits of foot pedals have been more than obvious. From controlling the amperage to adjusting them anytime, foot pedals can contribute a lot while welding. But they come with their due drawbacks too.
The very first con that strikes out – lack of proper maneuverability. Foot pedals only seem to work the best when you have a fixed placement or working bench. If you have a habit of working on multiple pieces at once, you’ll soon get quite bored of foot pedals.
Because the time it takes to readjust them to your current placement, is just not worth it. Furthermore, foot pedals come with multiple foot pedal cords. Previously, these cords used to take up more than half the space under benches. Even now, they can cause quite a lot of clutter.
Like most cords, the thin stripes eventually start to wear out and become damaged. If you keep on moving the cords continuously, the rate of damage will skyrocket further.
Again, since there are many cords, it’s pretty frustrating to figure out which one is damaged in the first place. Not to mention the crookedness that can happen, if the thin cords come into contact with the welding heat. The occupational hazards can often turn too serious.
So, that’s something you’ll need to frequently deal with if you choose to use the traditional foot pedals. If you have a clean set-up and need guidance, foot pedals are great. But if not, it’s probably a good idea to look into other options in addition to the traditional ones.
Now in terms of product description/selection, things can get a little different. While browsing, you’ll find that most of the older models still heavily support the foot pedal system. In fact, the whole control panel configuration is designed around it one way or the other.
The comparatively newer models, however, have started to get out of the circle to an extent. For instance – have a look at the product notes of the Power-I-TIG-200, one of the most formidable models currently. The notes clearly state that the usage of the foot pedal is optional. They’ll only control the full range of the amps (which is around 5-200 A or so for the Power-I-TIG-200). If you do use them, that is.
Other than the amp control, the foot pedals aren’t inherently interconnected with any of the other control panel settings. Neither are they limited to the original adjustments by the panel.
If we were to consider this description as an ideal instance for the newer TIGs, foot pedals are truly optional. You can definitely choose to use/need them while welding. But that doesn’t mean that you absolutely have to fully restrict yourself to them either. Once you’re ready to take on the welding via free movements, you’re more than welcome to get rid of the foot pedals.
How To Properly Set Up A Foot Pedal For Your TIG Welder?
Unlike the internal mechanism of foot pedals, setting them up is no big deal. To help you out further, here’s a brief overview of the set-up instructions for TIG welder foot pedals.
Step 1: Plug The Pedal
Well, you can’t watch the TV without plugging it into the socket can you now? The very first step in setting up foot pedals is to plug them into the actual machine.
That’s how you will establish the connection between the control panel and the pedals. It’s a simple pin to plug set up so you shouldn’t ideally have any problems in identifying them. Just make sure that the pin numbers match up. Also, like the normal pin to plug setups, you can use additive adapters to extend the connection.
Step 2: Fix The Amperage On The Panel
The control panel on the machine will showcase the implemented settings. Select the maximum or peak amperage that you’re going to work with. Then you can readily throttle the pedals to reach the selected peak amperage.
Step 3: Initiate Remote Mode
If you’re using a concurrent model, then you’ll need to switch to remote mode to engage the foot pedals. It indicates that you’re manually controlling the amperage via the foot pedals.
Step down on the pedals for a maximum of five to six seconds to initiate the remote mode. You should see a little green light pop up if there’s an active connection with the control panel. Then you can effectively use the foot pedals.
Step 4: Switch To 2T If In 4T
If the machine is in 4T mode, it means that the control panel is dictating everything. As such, you can’t use the foot pedals since they require manual attention and directives. So, switch to 2T if you want to keep using the foot pedals.
Step 5: Test The Connection
Remember that the selected amperage on the panel is what your foot pedals get adapted to. However, it’s best to always test the intensity first before welding on the working piece.
The foot pedals will not work at all if there’s no active connection between them and the control panel. But you could also end up accidentally putting down the wrong amperage on the panel. If so, testing the connection is a great way to figure out such mistakes in advance.
Pulse Welding With Foot Pedals: Yay Or Nay?
Now let’s talk about pulse welding. They play a great role in the ‘do you need a foot pedal with a TIG welder’ debate. Foot pedals are one of the most effective ways to initiate pulse welding.
Pulse welding is basically the main reason why you’re able to adjust your amperage on the fly. By using foot pedals, you’re already removing the limitations of the steady amperage. The control panel will then only dictate the peak amperage i.e. maximum you can work along.
As you can already tell, pulse welding works via sending little pulses of waveforms instead of steady ones. And the intensity and the consistency of these pulses depend on how fast or slow you’re pedaling along.
If you want a constant flow of current i.e. amperage, you’ll need to pedal consistently and maintain a steady pulse. If you need more power or heat, you can add more force to the foot pedals. Then you’ll get closer to the peak amperage set by the control panel.
And if it’s too much heat, simply just as easily relieve the pressure off the pedals accordingly. Here’s how you can remember the pulse settings accurately.
- Constant stimulation i.e. pressing and releasing the pedal consistently for steady amperage
- Flooring the pedals to reach max amperage
- Backing off completely to reach base amperage
Needless to say, it takes quite a bit of patience to get the pressure right for steady amperage. This is also why foot pedals are better known for their adjustability on the fly instead.
However, pulse welding is really effective for welding thin pieces of metals if you’re experienced enough. You can carry out the procedure in a really intricate way and stay in control every step of the way.
Benefits Of Pulse Weld Settings
Before knowing the benefits of pulse weld settings, let’s take a look into some terminologies related to pulse welding.
Background Amperage
Background amperage is usually taken in percentage to indicate the lower end of the pulse waveforms. It’s the amp you’ll weld with when you’ve fully backed off the pedals.
Duty Cycle
The duty cycle is also measured in percentage. It refers to the equilibrium between the simultaneous high and low ends of the pulse waveforms. Hence, a higher duty cycle means that the amperage will stay high mostly in the duration of the pulse settings. And vice versa.
Pulse Frequency
The pulse frequency is the required frequency that co-exists with both the background amperage and duty cycle. If the pulse frequency is 1 Hz, you’re working with a single pulse per second and similarly. The higher the frequency is, the faster you’re going on the foot pedals.
Now, as for the benefits, here are a few!
A higher percentage of productivity
Maintaining a steady duty cycle ensures great control over both the background amp and the working amp. Thus, it’s easier to cool on and off on command which ensures more productivity and efficiency.
Uniform Penetration
While welding, consistent pulse settings can ensure uniform weld penetration. As such, it’s great for thin wires or metallic pieces where you don’t have much room for errors.
Less Wastage
With pulse welding, you can do more work for half the amount of heat than in normal settings. This reduces the amount of overall wastage. Besides the mechanical equivalent of the wastage, it helps to conserve the welders’ time, energy, and patience as well.
Easier To Carve Details
If you’re reaching out for perfection, pulse welding with foot pedals is the way to go. Since you can adjust the amperage anytime via the pedals, it’s much easier to carve details. You can simply go up and down the slope anytime, increasing and decreasing the heat at will.
Middle Ground Solution: Wireless TIG Welder Foot Pedals
‘Do you need a foot pedal with a TIG welder?’ If you’re thinking of saying no due to the drawbacks, think again. The primary issue with traditional foot pedals is that they come with lots of baggage and clutter.
So what if you removed the component of clutter overall? You could alternatively opt for the middle ground solution i.e. the wireless TIG welder foot pedals instead!
Wireless foot pedals have the same working mechanism as the regular ones. As in, you can use them to directly control the amperage during the TIG welding sessions. In terms of usage, there aren’t any major differences either. You’d use them the same way as the traditional foot pedals. Minus all the clutter, of course.
Wireless foot pedals, by definition, don’t have any cords like the normal foot pedals. You might wonder how they stay connected with the control panel then? Well, instead of a direct connection, the signals are transmitted via a transmitter placed in the base of the pedals.
The signals are reciprocated by a receiver and simultaneous exchange of operations takes place. Other than these little mechanical changes, there are virtually no other superficial differences between the two.
Benefits Of Wireless TIG Welder Foot Pedals
Here’s a brief rundown of all the benefits of wireless TIG welder foot pedals! They’ll help out with the big ‘do you need a foot pedal with a TIG welder’ debate in your mind.
Lack Of Baggages
Lack of all those cords will already lift up your spirits in the workspace. You won’t have to spend your precious time clearing all the clutter beneath the desk before welding any longer. You can simply focus on welding while the pedals run in the background, as they should.
No More Limited Manoeuvrability
Previously, you would need to stick to a certain desk to maximize productivity. With the wireless pedals, you can move around at will. As long as you’re in the same room, you can work on all the pieces in different corners. Maneuverability will no longer continue to cause aching pain in your head like before.
Speedier Connection
Since the transmitter and receiver work a lot faster than manual cords, you’ll have a speedier connection. The signals will transmit faster and it’ll speed up the overall process of welding too.
Long-Lasting
We’ve already gone over the fragility issues of the pedal cords in traditional foot pedals. Since there are no physical cords in the wireless foot pedals, they don’t get damaged easily. As such, the wireless foot pedals are a lot more durable.
Time-Saving
You won’t have to spend hours just to de-clutter the workspace. You can start to work on the projects right after connecting the pedals.
Comfortable & Safe Usage
Hundreds of cords lying around are a major safety hazard. With that nuisance out of the way, you can ensure a safe and comfortable work zone.
Wireless TIG Welder Foot Pedals: Limitations
Even though they’re apparently better than the traditional foot pedals, the wireless ones themselves aren’t past limitations. Here are some cons you’ll have to deal with if you decide to invest in wireless TIG welder foot pedals.
Not Budget Friendly
Wireless foot pedals cost a lot more than normal or traditional foot pedals. You may even need to pay almost double the usual price.
Signal Restrictions
Since the device works via wireless signals, it may not fare well in closeted spaces. For instance, high up in the alps or deep inside the sea in a submarine. Basically, if the signal strength is weak someplace, the wireless pedals will become infinitely useless there for the time being.
Final Verdict
So, do you need a foot pedal with a TIG welder? Turns out, the answer swings both ways! Depending on how efficient you’re with the welding machine, you can choose your options. As the article suggests multiple times, if you’re just starting out, foot pedals are a must. You really will need to understand the concept of amperage before you can do anything else.
Foot pedals will grant you the opportunity to work with low amperages so you won’t feel as baffled right away. Once you have played around with the control panel enough times, you can automatically manipulate the amperage and upslope simultaneously. And when that happens, foot pedals will feel nothing but training wheels before your experienced eyes.
Of course, you can still use the foot pedals if you’re comfortable with them. Or, if you feel like they make you a better welder. A lot of the welders feel that the foot pedals help them to retain the quality of the overall procedure.
And if the positioning is an issue with the traditional foot pedals, you can simply always switch to the wireless ones. At the end of the day, it all effectively boils down to preferences.
Depending on how comfortable you’re with your welding skills, you can switch to manual or automatic pedals at any given time. There aren’t any hard and fast rules to it, other than the preventative and maintenance measures.