
Plasma cutting is a process that uses a high-speed stream of ionized gas to cut through metal. This method of cutting is efficient, precise, and cost-effective, making it a popular choice for both industrial and hobbyist metalworkers. However, to get the most out of your plasma cutter, it is essential to set it up correctly.
In this article, we will walk you through the process of setting up your plasma cutter, from unboxing to cutting your first piece of metal.

Safety Precautions
Before diving into the setup process, it is crucial to understand the dangers associated with plasma cutting. The high-speed stream of ionized gas used in the cutting process can cause severe burns and eye damage, and the sparks and metal shrapnel produced can cause fires and other accidents.
To ensure your safety during the setup and operation of your plasma cutter, it is essential to follow proper safety procedures and to wear the appropriate safety equipment, such as gloves, goggles, and a face shield.
Unboxing and Assembling the Plasma Cutter
When you receive your plasma cutter, it will come in a box with all of the components needed for assembly. These components will typically include the plasma cutter unit itself, the torch, the power supply, and any necessary cables and hoses.
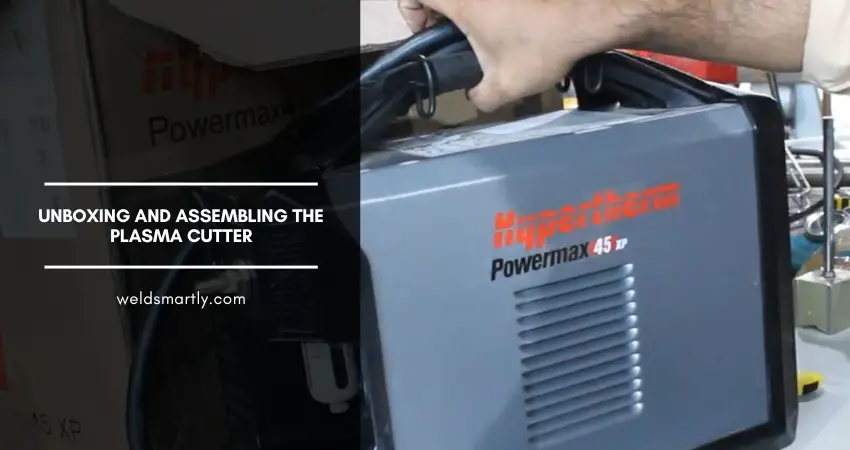
To assemble your plasma cutter, follow these steps:
- Carefully unpack all of the components from the box.
- Attach the torch to the plasma cutter unit by screwing it into place.
- Connect the power supply to the plasma cutter unit using the appropriate cable.
- Attach any necessary hoses to the plasma cutter unit, following the manufacturer’s instructions.
Connecting the Power Supply
Plasma cutters require a specific type of power supply, either single-phase or three-phase. It is important to check the specifications of your plasma cutter to determine the type of power supply it requires. If you are unsure about the type of power supply you need, consult the manufacturer’s instructions or a qualified electrician.
When connecting the power supply, it is essential to follow proper safety procedures and to turn off the power to the area where you will be working. Once the power is off, connect the power supply to the plasma cutter unit by following the manufacturer’s instructions.
Setting up the Air Supply
An air supply is essential for plasma cutting as it is used to cool the torch and to blow away the molten metal produced during the cutting process. The air supply must have a minimum flow rate and pressure specified by the manufacturer. A compressor with a higher flow rate and pressure may be used, but never one with lower flow rate and pressure.

To set up the air supply, follow these steps:
- Connect an air hose to the plasma cutter unit, following the manufacturer’s instructions.
- Connect the other end of the air hose to the air compressor.
- Turn on the air compressor and adjust the pressure to the level specified by the manufacturer.
Installing the Torch
The torch is the component of the plasma cutter that delivers the high-speed stream of ionized gas used to cut through metal. There are several different types of torches available, each with its own set of advantages and disadvantages. It is important to select the right torch for your specific cutting needs and to install it correctly.
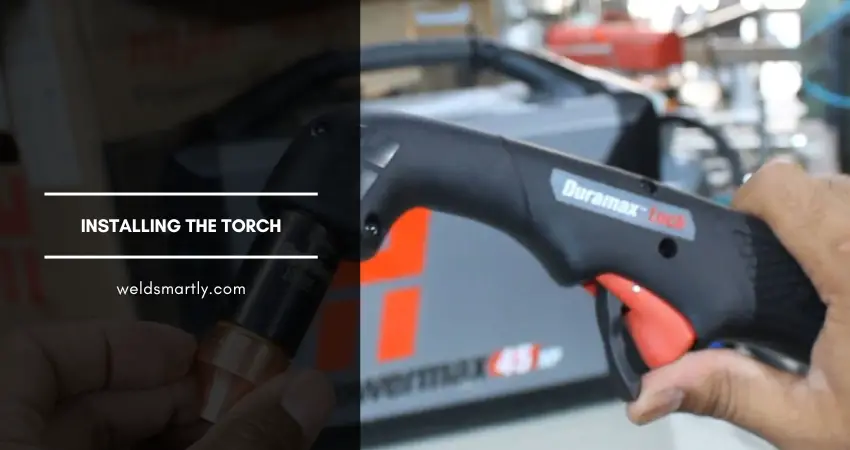
To install the torch, follow these steps:
- Carefully unpack the torch from its packaging.
- Remove the protective cap from the end of the torch.
- Insert the torch into the plasma cutter unit, making sure that it is securely in place.
- Replace the protective cap on the end of the torch.
Calibrating the Plasma Cutter
Calibrating the plasma cutter is an essential step in ensuring that the machine is operating at the correct settings for the specific materials and thicknesses you will be cutting. Proper calibration ensures that the machine is cutting at the correct amperage and voltage, which leads to a cleaner, more precise cut and prolongs the life of the machine’s consumable parts.
Guide for adjusting the amperage and voltage:
- Start by setting the amperage according to the manufacturer’s instructions. This can typically be done by adjusting the settings on the machine’s control panel.
- Once the amperage is set, use a multimeter to measure the voltage at the torch head.
- Adjust the voltage as necessary to match the recommended value for your specific machine and cutting material.
- Repeat the process until the amperage and voltage are within the recommended ranges.
Tips for troubleshooting common calibration issues:
- If the cut is too narrow or too wide, the amperage may be too high or too low. Adjust accordingly.
- If the cut is not clean and has a lot of slag, the voltage may be too low. Adjust accordingly.
- If the cut is not deep enough, the voltage may be too high. Adjust accordingly.
Testing the Plasma Cutter
It is important to test the plasma cutter before use to ensure that it is operating correctly and safely. A test cut allows you to check the machine’s settings, the quality of the cut, and the condition of the consumable parts.

performing a test cut:
- Start by selecting a piece of scrap metal of the same thickness and material as what you will be cutting.
- Place the metal on a secure and flat surface.
- Turn on the plasma cutter and adjust the settings according to the manufacturer’s instructions.
- Make a test cut on the scrap metal.
- Inspect the cut for quality and cleanliness.
- Make any necessary adjustments to the machine’s settings.
troubleshooting common issues during testing:
- If the cut is not clean and has a lot of slag, the amperage or voltage may be too high. Adjust accordingly.
- If the cut is not deep enough, the amperage or voltage may be too low. Adjust accordingly.
- If the machine is not cutting at all, the consumable parts may need to be replaced.
FAQs
How do I properly set up a plasma cutter?
Setting up a plasma cutter involves connecting the power supply, plasma torch, and air compressor, adjusting the settings on the power supply, and properly grounding the workpiece. It is important to consult the manufacturer’s instructions for specific details on setting up your particular plasma cutter.
What are the components of a plasma cutter and what do they do?
A plasma cutter typically includes a power supply, a plasma torch, and an air compressor. The power supply provides the electrical energy to ionize the gas, the plasma torch focuses the gas into a high-velocity jet, and the air compressor supplies the compressed air that is used to ionize the gas.
What are the different types of plasma torches available?
There are several different types of plasma torches available, including hand-held torches, mechanized torches, and automated torches. The type of torch used will depend on the specific application and the materials being cut.
What are some safety precautions to take when using a plasma cutter?
Safety precautions when using a plasma cutter include wearing appropriate personal protective equipment, properly grounding the workpiece, and avoiding contact with the ionized gas stream. It is also important to follow all safety guidelines provided by the manufacturer.
What are the most common problems that can occur when using a plasma cutter and how can they be solved?
Common problems that can occur when using a plasma cutter include poor cutting quality, difficulty starting the cutter, and difficulty maintaining the proper cutting speed. These problems can often be solved by adjusting the settings on the power supply, properly grounding the workpiece, and ensuring that the air compressor is working properly.
Are there any specific techniques to master when using a plasma cutter to cut metal?
Yes, there are several techniques that can be used to improve the quality and efficiency of cuts made with a plasma cutter. These include adjusting the angle of the plasma torch, using the proper cutting speed, and using the proper shielding gas.
Conclusion
Setting up a plasma cutter is a process that involves choosing the right machine for your specific needs, calibrating the machine for optimal cutting performance, and testing the machine before use.
It is important to regularly maintain the machine by cleaning it, checking for worn parts, and following the manufacturer’s instructions for care and use. If any issues arise during use, refer to the manufacturer’s troubleshooting guide or seek assistance from a professional.
Plasma cutting can be dangerous if proper safety precautions are not taken. It is important to seek additional training and resources to ensure that you are operating the machine safely and effectively.
Sources:
- https://www.millerwelds.com/resources/welding-guides/metal-cutting-guide/plasma-cutting-tips
- https://www.lincolnelectric.com/en/welding-and-cutting-resource-center/plasma-cutting-resource-center/process-and-theory/how-a-plasma-cutter-works
- https://www.hypertherm.com/solutions/technology/plasma-technology/